
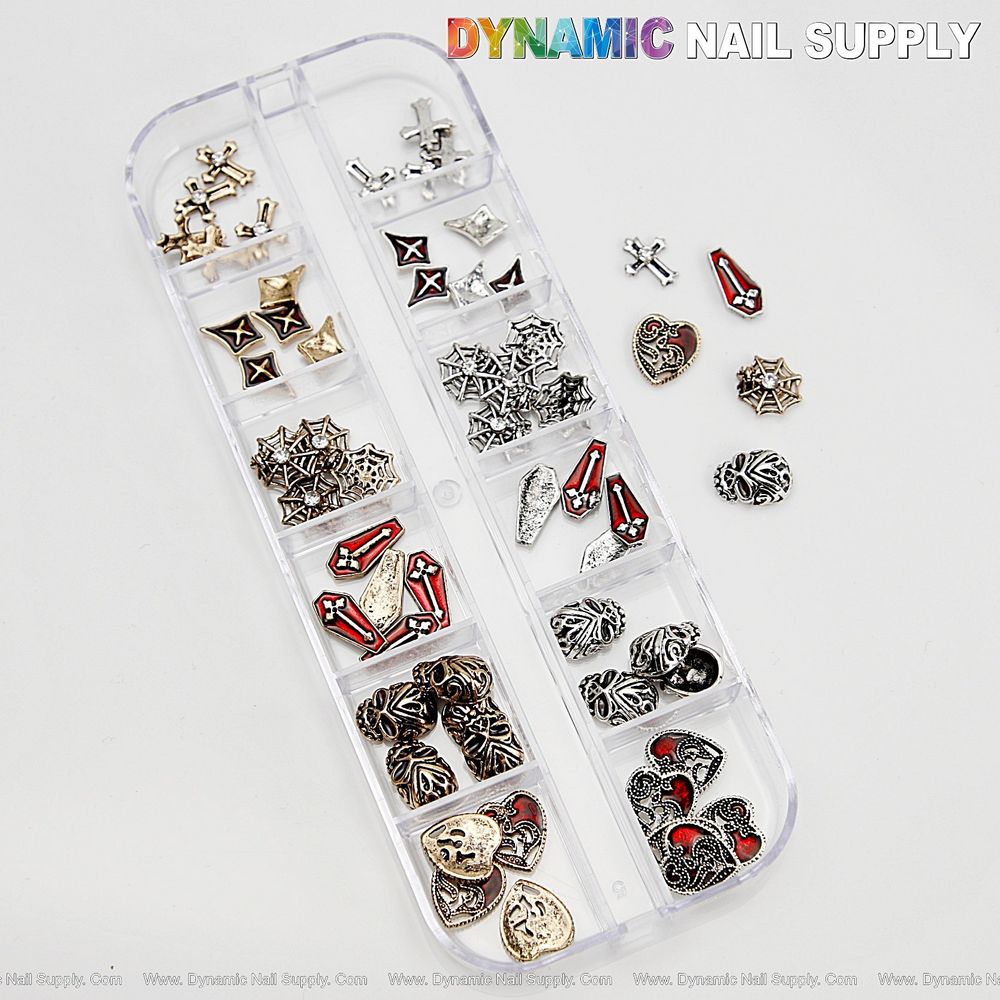
The 6 styles 60pcs Metallic Gold and Silver Red Cross Coffin Skull Charms are a compartmented mixed-metal charm set with enamel accents and tiny clear rhinestones designed for refined gothic accenting.
How do you translate this set into a wearable single-accent service?
Start by planning for a low-effort, high-contrast service: clear or white-background nails with a single deep blood-red enamel coffin charm as the focal point per nail. For consistency and speed, place 60pcs Red Cross Coffin on one nail per hand—usually ring finger or middle—so the visual read is deliberate rather than crowded. This set’s mix of polished gold/bronze and silver metals, plus black enamel and crystal pinpoints, lets you add a single metallic stud or tiny bronze heart on an adjacent nail for balance without losing the subtle effect.
Which base choices give you the cleanest contrast and fastest turnaround?
You want bases that read crisp against the vivid red enamel and mixed metals. For mobile or express services choose a true clear gel or a clean opaque white background; both make that blood-red coffin pop. If using polish, a streak-free white with a high-opacity formula reduces cure time and lamp dependence. For gel bases, use a thin, flat builder-in-a-bottle or base gel and cure fully to a firm, level surface so the charm sits flush. Matte black bases also work when you plan a single bronze charm to break the field, but that increases finishing steps—reserve matte for booked add-ons.
What is the fastest, most repeatable placement and adhesion workflow?
Use a repeatable three-step workflow to keep services consistent across techs and clients: placement template, adhesive staging, final seal.
- Placement template: Measure and mark the center-line of the nail with a fine white or grey pencil at 1/3 from the proximal edge—this spot gives a balanced read on both short and long nails. For coffin-shaped charms, align the charm’s long axis with the nail’s center-line and sit the charm slightly distal to the natural free edge for visual lift.
- Adhesive staging: For the quickest set, use a medium-viscosity gel adhesive or thick UV resin cured for 2–6 seconds tack-only to test final placement, then fully cure. If you prefer glue, a thin drop of a high-bond nail glue applied to the nail and charm base will seat faster, but watch positioning—glue grabs instantly.
- Final seal: Encapsulate with a thin layer of clear builder gel or two coats of a long-wear topcoat. When working with metal edges, feather the gel around the charm base and cure to avoid lift; for glues, apply a thin layer of brush-on topcoat over the bond line to lock edges.
Which charm pieces in this tray do you use for subtle accents and why?
Pick the deep red enamel coffin charms as your focal pieces and reserve small silver spiderwebs or tiny clear-rhinestone studs as supporting touches. The set’s antique bronze filigree hearts and chrome silver crosses work as single-dot accents on an adjacent nail to echo the main motif without competing. Use gold-tone pieces sparingly when the client has warm skin tones—mixed-metal balance is delicate here, and overuse flattens the subtle Halloween intention.
How do you coordinate finishes and textures to keep the look refined?
Consistency in finish matters more than variety. If the charm tray’s metals read polished, keep your topcoat high gloss to harmonize reflections. For contrast, pair a glossy coffin charm on a softly matte white background, then add a narrow glossy cuticle line to tie the reflection back into the set. Avoid heavy glitter or thick flakes—this kit’s small clear crystals are the intended sparkle points; let them read as pinprick highlights rather than competing focal points.
What quick client presentation and aftercare notes improve perceived value?
Present the single-accent mani as a neat, intentional upgrade: one bold crimson coffin per hand plus a coordinating metallic accent. Tell clients simple wear notes—avoid picking at edges and recommend reapplication of thin topcoat after two weeks for polish services. For salon record-keeping note the exact placement template and adhesive used so follow-up services replicate the look efficiently. The set retails at about $9.99; prices may change.
Are there handling or safety points to keep in mind?
These are small metal and crystal charms—keep them away from children and store in the compartmented tray to avoid loss. When using cyanoacrylate glues, work in a ventilated space and avoid skin contact with the adhesive; remove excess glue promptly with monomer or glue remover per product instructions. For tech comfort, use fine tipped tweezers and a micro wax pencil for placement to minimize handling time.
Mini glossary
- Placement template: A repeatable mark or measurement guiding where to sit the charm.
- Tack-cure: Brief curing to make adhesive slightly sticky for final adjustment.
- Encapsulation: Sealing charm edges with builder gel or topcoat to prevent lift.
Mini FAQ
- Can I use these charms on natural nails? Yes—adhere with nail glue and seal carefully, but advise gentle wear and reinforce at the first sign of lift.
- Do mixed metals clash on short nails? Keep accents minimal; one metallic accent plus the red coffin maintains clarity on short lengths.
- Will crystals need special care? Treat them like other 3D pieces—avoid harsh scrubs and re-topcoat periodically to secure edges.
